
Installing a toilet yourself is often seen as a hassle, which is why many homeowners prefer to spend $180 to $490 an hour to hire professionals. However, when you purchase a new toilet, the package typically includes detailed installation instructions. With the right tools and some basic skills, you can easily complete the installation. If you're unsure of the process, this article will provide you with a complete guide from removing the old toilet to installing the new one. Let's get started!
Note: This guide is quite general. If you purchased from Giving Tree Home, we recommend following the video to complete the installation thoroughly.
Step 1: Instructions and Precautions
Before you begin, assess whether you are willing to complete the entire installation process yourself. While installing a toilet doesn’t require advanced plumbing knowledge, it does require precision and attention to detail. This may take you about 4 to 6 hours and could cost between $100 to $300 for the necessary materials. If you are unsure about your ability to execute this process correctly, it’s best to consult a professional plumber.
If you decide to go ahead, please prepare the following tools:
- Cutter
- Bolts
- Wax ring
- Wrench
- Scraper
- Sponge or rag
- And more

Step 2: Removing the Old Toilet
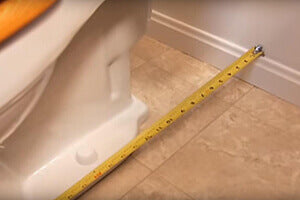
- Measure the Size
Before purchasing a new one, measure the dimensions of the old toilet to ensure a proper fit in its original location and avoid unnecessary shipping costs.
- Turn off the Water Supply
To shut off the water supply to your toilet, locate the shut-off valve behind the toilet and turn it clockwise to stop the water. Next, flush the toilet to drain most of the water from the tank and bowl. Keep a bucket and rags nearby to catch any remaining water, then disconnect the water supply line from the bottom of the toilet tank.
- Remove the Tank
To remove the toilet tank, unscrew the bolts connecting it to the bowl, then carefully lift the tank off and set it aside.
- Disconnect the Bowl
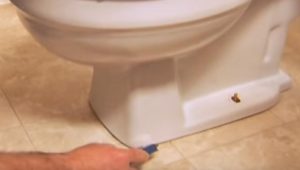
Use a wrench to loosen and remove the nuts from the bolts securing the toilet bowl to the floor, usually found at the base
- Break the Seal
The bottom of the toilet bowl is typically sealed with a wax ring. After removing the nuts, gently rock the toilet back and forth to break the seal. You can also use a putty knife or scraper to assist in this process.
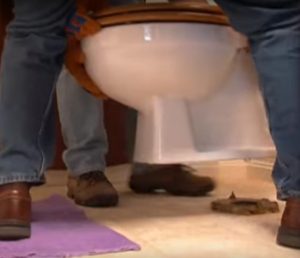
- Lift and Remove
Once the seal is broken, lift the toilet straight up off the floor. It may be heavy, so having someone assist you is advisable. If there's any water left inside, tilt the toilet slightly to drain the remaining water into a bucket.
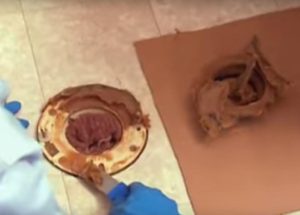
- Clean and Inspect the Flange
After removing the toilet, use a scraper or putty knife to remove any remaining wax from the floor flange. Clean the area thoroughly with a disinfectant cleaner, and take a moment to inspect the flange for any damage. If you notice any damage, it may need to be replaced.
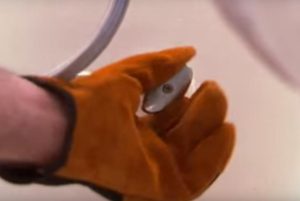
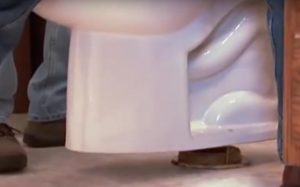
Step 3: Installing the Flange
After removing the old toilet, it's time to install the new one, starting with the replacement of the flange. Begin by cleaning the area thoroughly and ensuring the floor is level; use a spirit level to check and adjust as necessary. Cut the pipe to the correct length using a hacksaw or tubing cutter, smoothing any rough edges with a file for a proper fit. Securely attach the closet flange to the soil pipe, and fasten it in place with screws.

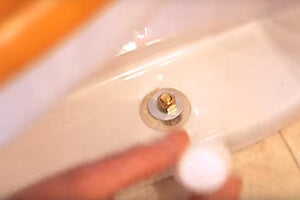
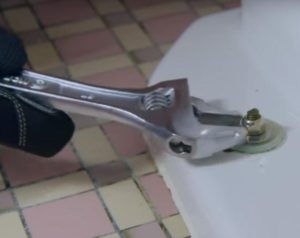
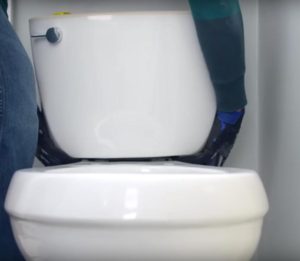
Step 4: Setting the Toilet
Carefully lower the toilet bowl over the soil pipe, ensuring the holes in its base align with the bolts on the flange. Gently press down to seat the toilet onto the wax ring. Once level, tighten the bolts securely to ensure a stable installation.
Step 5: Install and Connect the Tank
Begin by attaching the bolts and gaskets to the bottom of the tank to ensure a secure seal. Carefully lift the tank and position it onto the bowl, making sure the bolts align with the corresponding holes. Use a wrench to evenly tighten the bolts for a stable connection.
Next, select a braided water supply line of appropriate length, ensuring it fits snugly without bends or excessive pressure on the pipes. Connect this line to the bottom of the toilet tank to complete the installation.
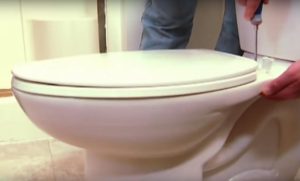
Step 6: Installing the Seat and Lid
Once the tank is securely installed, the final step is to attach the seat and lid. Use the provided bolts to fasten the seat and lid to the toilet. Be cautious not to overtighten; they should be snug but not excessively tight.
Now, take a moment to step back and admire your work—you’ve successfully installed your toilet without needing any plumbing services!
Step 7: Testing for Leaks
After installing a toilet, it's crucial to test for leaks to ensure everything is functioning correctly. Follow these steps:
- Begin by turning on the water supply and allowing the tank to fill.
- Flush the toilet to ensure proper operation and to check for any leaks.
- Carefully examine the base of the toilet for any signs of water seeping out.
- Inspect the water supply line to ensure it remains dry.
- If you notice any water drips or wet spots, gently but firmly tighten all bolts.
Ending
By carefully following these steps and adhering to safety precautions, you can successfully install the toilet and enjoy the convenience and comfort it provides for years to come. While there may be differences in brands and models, there's no need to worry because Giving Tree Home will provide detailed installation instructions for the toilets we sell. You can install them according to the instructions, and if there are still any unclear areas, feel free to contact our customer service team anytime, as they will be happy to assist you!
Related Articles:


