
When renovating a new bathroom or updating an old one, dealing with bathtubs can often be frustrating. This process is not only time-consuming and labor-intensive, but it can also require a significant financial investment. More importantly, if any part of the process goes wrong, you may find yourself in an awkward situation. To assist homeowners who are renovating their bathrooms, Giving Tree Home offers a comprehensive bathtub replacement guide. From removing the old bathtub to installing the new one, we will step-by-step address all potential issues you may encounter, ensuring your bathroom is refreshed, more functional, and aesthetically pleasing. Let’s take this step together and easily create the bathroom space of your dreams!

Step 1: Choose a Bathtub
If you’re planning to replace your bathtub and haven’t officially started yet, this step is crucial. Even an acrylic bathtub can weigh between 70 to 80 pounds, and if the bathtub you purchase turns out to be unsuitable or undesirable, you may incur high shipping costs. Here are some key aspects to help you find the right bathtub:
- Installation Type: In typical households, freestanding and built-in bathtubs are the most common options. Freestanding bathtubs do not need to fit against a wall; they simply require plumbing connections to the drain. On the other hand, built-in bathtubs need to consider their alignment with the surrounding walls, which is the focus of this article.
- Size: Ensuring that the new bathtub fits properly is key to a successful installation. You need to know standard bathtub sizes and how to measure a bathtub correctly. Once you grasp these two points, the process of selecting and installing will become much clearer.
- Brand: For large, long-term use products like this, it is advisable to choose a well-known brand like Giving Tree Home, which offers up to a 3-year warranty. If you’re not interested in our brand, that’s fine; we have prepared a list of bathtub brands to help reduce your selection workload.
In addition to these three points, there are other factors you may need to consider, such as budget, style, and functionality. It is very important to choose a bathtub that you like and that suits your needs, as it may accompany you for many years. If you’re still unsure where to start, we recommend reading our bathtub buying guide.
Step 2: Tools and Equipment
To ensure smooth removal and installation of the tub, it is recommended to have at least two people and prepare the following tools and equipment in advance:
- Screwdriver
- Wrench
- Utility knife
- Pry bar
- Safety goggles
- Dust mask
- Construction gloves
- Leveler
Step 3: Removing the Old Bathtub
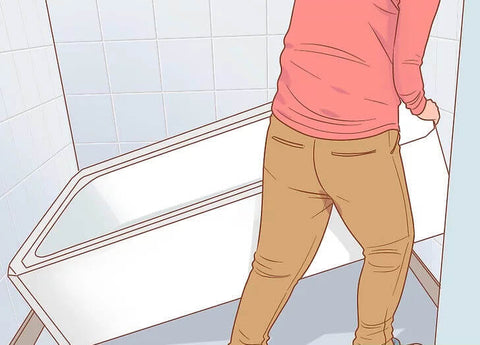
Removing the old bathtub poses the biggest challenge due to its close connections with the plumbing and walls. Any incorrect actions could lead to pipe bursts or wall damage, resulting in significant financial losses—something no one wants to experience. To avoid this, familiarize yourself with all the inlet and outlet pipes around your bathtub and shut off all relevant plumbing.
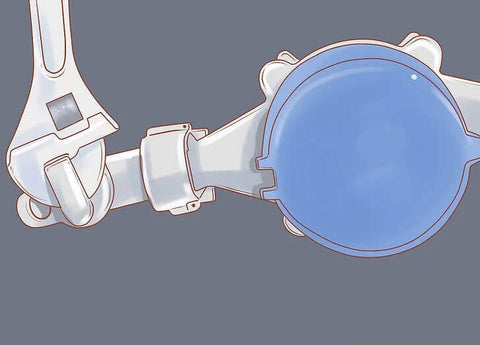
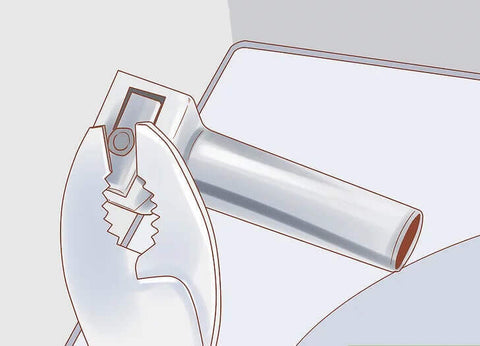
Once all the plumbing is shut off, you can begin removing all components or accessories from the bathtub, such as faucets, showerheads, and drain covers. Throughout this process, use a screwdriver and wrench, and avoid using brute force! If these components or accessories can be reused, be sure to store them properly.
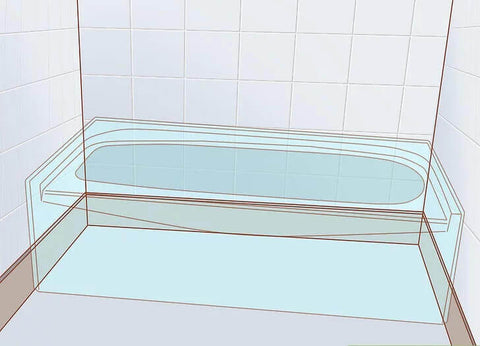
For built-in bathtubs that fit tightly against the walls, you may need to remove the wall tiles surrounding the bathtub. Carefully pry open the wall to expose the bolts that secure the bathtub to the wall. Exercise caution throughout this process to avoid damaging any internal wiring or pipes within the walls, as this could lead to major issues!
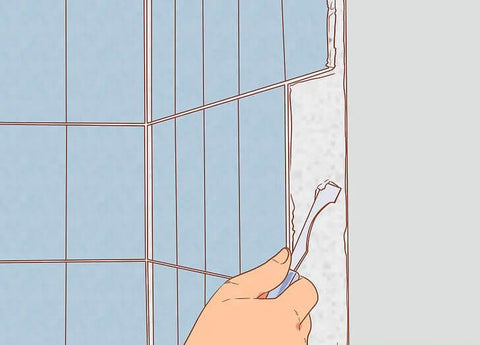
Typically, the area around and beneath the bathtub is filled with sealant, so you'll need to use a utility knife to remove the sealant before fully detaching the bathtub. If your bathtub is made of solid resin or acrylic, breaking it apart might be a more convenient solution.
Step 4: Check Pipes Status
Between removing the old bathtub and installing the new one, there is an important step that is often overlooked: checking the condition of the pipes, including the supply pipes, drain pipes, and shut-off valves. Failing to carefully inspect these before installing the new bathtub can lead to issues after installation, requiring you to dismantle everything again. Therefore, it’s essential to be mindful of the following signs to ensure there are no problems with the pipes before proceeding:
- Low water pressure: If faucets or shower heads have a low flow rate, it could indicate blockages in the supply pipes.
- Slow drainage: If sinks or drain pipes in the bathroom are draining slowly, it suggests a blockage in the drainage system.
- Mold or mildew: Presence of growth around pipe fixtures or walls indicates high moisture levels or leakage in the pipe fixtures.
- Rust or corrosion: Rust and corrosion on metallic parts of fixtures indicate a high level of moisture or water leakage.
- Leaks: Water dripping from pipes suggests a leak that needs to be patched or the pipes replaced, especially if the leak is severe.
Fortunately, addressing these issues is often simpler than it may seem. For example, you can resolve problems like mold growth, corrosion, and low water pressure by replacing faulty pipes or patching minor leaks. Additionally, slow drainage issues can typically be remedied by unclogging the drain pipes to restore normal flow.
Step 5: Leveling Bathroom Subfloor
Leveling the floor is crucial before installing the new tub to ensure proper drainage, tub stability, and comfortable usage while minimizing the risk of damage or leakage.
How to level the bathroom subfloor:
- Prepare the subfloor: Remove any materials covering the floor to expose the subfloor. Thoroughly clean the subfloor to remove debris, dirt, or adhesive residue.
- Identify uneven areas: Use a leveler to identify high or low spots on the floor, paying particular attention to the spot where the bathtub will be installed.
- Fill low spots: Fill any depressions on the subfloor using a floor leveling compound or self-leveling concrete.
- Smooth high spots: Use a sander or grinder to smooth out any high spots on the floor.
- Check for levelness: After each step, check the level of the floor using the leveler. Ensure not to over-grind high spots or over-fill low spots. Once all parts of the floor are leveled, apply an additional layer of self-leveling concrete or leveling compound and allow it to dry thoroughly.
Step 6: Installing the New Bathtub
Beforehand, measure the dimensions of the bathroom door and the area where the bathtub will be placed to ensure that the new bathtub can be smoothly installed. Use a marker to indicate the location where you intend to install the bathtub, ensuring that the drainage pipe and faucet align with those of the old bathtub and are roughly in the same position.
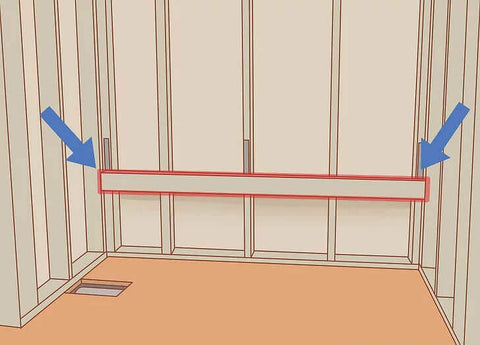
Typically, the area around the bathtub is enclosed by panels to protect the bathroom walls from moisture and mold. Begin by marking the positions of the bathtub fixtures, such as the faucet, drain, and handles, then use a vertical saw to cut out the surrounding space.
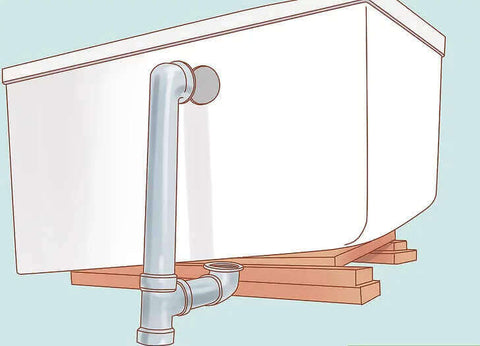
Before actually installing the bathtub, the drain pipe needs to be secured to the bathtub. Clean the area around the bathtub to ensure there is no dirt or debris, and align and position the drain pipe correctly. Next, gather all the drainage components, including the flange, rubber washers, drain keys, and shoes, and assemble them, ready to be installed on the bathtub. Apply putty or silicone sealant to the bottom of the flange to create a waterproof seal. Finally, connect the bathroom drain pipe to the threaded end of the drain shoe, and seal it using waterproof materials such as PTFE tape.
Step 7: Securing the Bathtub
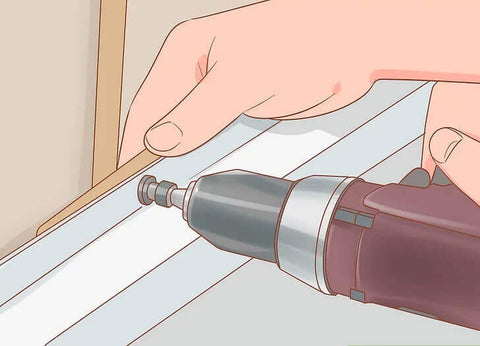
Now that your bathtub is essentially installed, the final step is to secure it in place and caulk the edges. Lift the bathtub and align it with the plumbing fixtures such as the faucet and drain pipe, ensuring that the bathtub snugly fits against the wall. Use corrosion-resistant screws to firmly secure the bathtub to the wall, and provide support from underneath if needed, preferably using rigid wooden boards. Finally, seal the edges of the bathtub with silicone caulking to ensure a waterproof seal.
Ending
Replacing a bathtub can be a daunting task, involving careful planning, the right tools, and meticulous execution. While the process can be rewarding, it often comes with challenges that may be overwhelming for some homeowners.
If you find the thought of tackling a bathtub replacement too troublesome, consider opting for a freestanding bathtub, which is easier to install with minimal plumbing adjustments and serves as a stylish centerpiece for your bathroom.


