
Discovering the timeless allure of a bathtub is akin to unearthing a personal sanctuary—where luxury meets daily comfort. But even the most resilient and well-maintained tubs aren’t immune to the passage of time. Surface scratches, especially in homes with active daily use, can quietly diminish the bathtub’s pristine appearance.
Fortunately, when it comes to stone resin bathtubs, most of these minor imperfections can be effectively remedied—without the need to replace the entire tub. In this step-by-step guide, Giving Tree Home shares practical knowledge—rooted in both hands-on experience and product expertise—to help you restore your stone resin bathtub to its original glory.

Understanding Stone Resin Material
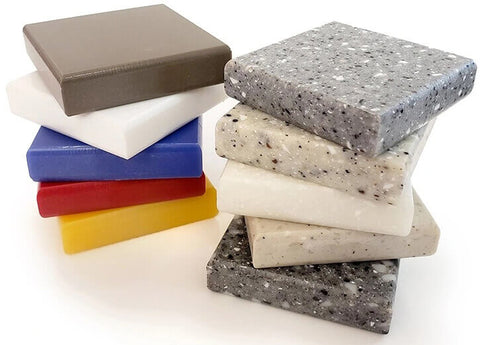
Before diving into the repair process, it’s important to understand what stone resin is—a knowledge that will also clarify why this material is particularly well-suited for surface restoration. Stone resin, often referred to as solid surface material, is an engineered composite made by combining natural crushed stone with high-performance resin binders. In some formulations, additional mineral components are incorporated to enhance durability, density, and finish quality. The result is a seamless, solid material that mimics the aesthetic of natural stone while offering increased strength and reliability.
This unique blend gives stone resin several advantages that make it ideal for bathroom applications. Its non-porous surface resists stains and water damage, while its dense structure adds a reassuring sense of weight and stability. Unlike traditional materials like porcelain or fiberglass, stone resin can be molded into contemporary forms with clean lines and smooth curves—making it a go-to choice for modern bathtubs, sinks, and shower surrounds.
Perhaps most notably, stone resin stands out for its ease of maintenance and repair. Unlike natural stone, which often requires costly professional refinishing, or acrylic, which can suffer from discoloration and warping over time, stone resin’s homogeneous surface allows for straightforward DIY repairs. Minor surface flaws such as scratches, scuffs, and dull spots can typically be restored using simple tools and materials, without compromising the structural integrity or visual appeal of the tub.
Related Reading: Complete Guide to Repair Acrylic Bathtub
Assessing the Damage
To ensure the right approach, start by examining the scratches closely—understanding their depth and characteristics will guide you in choosing the most effective repair method and tools:
- Light Scratches: These are surface-level lines that are visually noticeable but barely tactile. If you run your fingernail over them and feel little to no resistance, they're likely easy to fix.
- Moderate Scratches: Slightly deeper and more visible, these may catch your fingernail slightly. They require a bit more effort and careful sanding but are still within the realm of DIY repair.
- Deep Scratches or Cracks: These go beyond the surface layer and may appear as gouges or fissures. If the bathtub's structural integrity is affected or material is missing, a more advanced repair—or even professional service—may be needed.
Tools and Materials You'll Need
For most surface-level repairs, you'll need a few simple tools and materials. Here’s what to gather:
- Masking tape
- Transparent curing agent or resin filler
- Microfiber cloth (soft and lint-free)
- Mild liquid dish soap
- Warm water
- Fine-grit sandpaper (120 to 1200 grit)
- Polishing compound or rubbing compound
- Polishing pad or buffing cloth
- Wax or protective sealant (optional)
Most of these are household items or readily available at hardware stores. Specialized fillers or transparent curing agents can be found online or in stores that sell bathroom repair kits.
Step-by-Step Repair Process
- Tilt the Bathtub (If Necessary)
When repairing more serious damage—such as a chip or a missing portion of the bathtub surface—it’s important to prevent the liquid repair material from running before it cures. Because this material is fluid in its initial state, you may need to slightly tilt the bathtub to keep it contained within the damaged area. However, since stone resin bathtubs are extremely heavy, tilting should only be considered if absolutely necessary, and always with assistance from others or a professional installer.
Note: For simple surface scratches, tilting the bathtub is not required. You can safely skip this step.
- Clean the Surface Thoroughly
Dirt and grime can interfere with the repair process, so always start by cleaning the affected area. Mix a small amount of mild liquid dish soap with warm water and wipe down the entire bathtub using a microfiber cloth. Focus on the scratched area to remove any residues, then rinse thoroughly with clean water and let the surface dry completely.
- Apply Masking Tape
Use masking tape to isolate the repair zone. This not only helps contain the area you're working on but also prevents accidental smearing of filler or compound onto surrounding surfaces. It’s especially useful when applying liquid filler to avoid over-expansion of the repair area.
- Prepare the Repair Mixture (For Moderate or Deep Damage)
If your bathtub has visible gouges or deeper scratches, prepare a filler solution. For example:
Mix about half a paper cup of white slurry or resin paste
Add approximately 20 drops of transparent curing agent
Stir thoroughly until the mixture is smooth and even
This repair mixture is ideal for filling gaps and deeper imperfections in the stone resin surface.
- Perform the Repair
For Light Surface Scratches:
Use fine-grit sandpaper (800 to 1200 grit) to gently buff the scratched area. Use circular motions with light pressure to avoid over-sanding. This will remove the scratch and begin blending the area with the surrounding surface. Be patient; over-sanding can worsen the issue.
For Moderate to Deep Scratches:
Carefully pour the prepared repair mixture into the damaged area, making sure to fill the gap fully. Use a scraper or flat plastic tool to even out the surface, removing excess filler. Allow the mixture to cure for at least 40 minutes or as per product instructions.
Once cured, begin polishing in stages, using progressively finer sandpaper (start with 120, then 240, 600, and finally 800 grit). This gradual approach helps maintain a smooth and consistent finish.
- Polish the Surface
Apply a small amount of polishing compound or rubbing compound to a clean buffing cloth or polishing pad. Using circular motions, gently polish the repaired area until the surface becomes smooth and regains its natural luster.
Once satisfied with the repaired spot, blend it into the surrounding area by polishing the entire bathtub surface. This step is key to avoiding noticeable patching and ensures uniform shine.
- Apply Wax or Sealant (Optional)
For enhanced protection and a glossy finish, you may apply a bathtub-safe wax or sealant. Follow the product’s specific instructions, and always buff gently after application. While optional, this step can extend the life of your repair and protect against future scratches.
Maintenance Tips for Preventing Scratches
To preserve the flawless finish of your stone resin bathtub and minimize the risk of surface scratches:
- Avoid placing hard or sharp objects directly in the tub, such as metal buckets, heavy shampoo bottles, razors, or tools.
- Never use abrasive scrubbing pads, steel wool, or rough brushes on the surface—even when removing stubborn stains.
- Use a protective rubber or silicone mat at the base of the tub if young children or pets frequently use the bath.
- Lift items instead of dragging them across the surface, especially accessories like shower chairs or bath trays.
- Keep the water temperature steady, as sudden changes from cold to extremely hot may increase surface stress over time, making it more vulnerable to scratches.
Stone resin is highly durable, but preventative care remains the most effective way to extend its lifespan and keep it looking as new as the day it was installed.
Ending
Repairing surface scratches on a stone resin bathtub is not only possible but also remarkably straightforward with the right technique. With a bit of time and attention, you can restore the smooth, elegant finish that makes these tubs a focal point in modern bathrooms. By following this guide and practicing routine maintenance, your bathtub can continue to serve as a serene, luxurious retreat for years to come.
However, if the damage is too extensive to repair or your bathtub has reached the end of its life cycle, consider upgrading to a new model from Giving Tree Home. With years of expertise in stone resin craftsmanship, our bathtubs are designed to combine superior durability, seamless design, and timeless appeal—offering not just a replacement, but an upgrade in comfort and style.


